


Create new projects with standardized issues as part of a consistent process
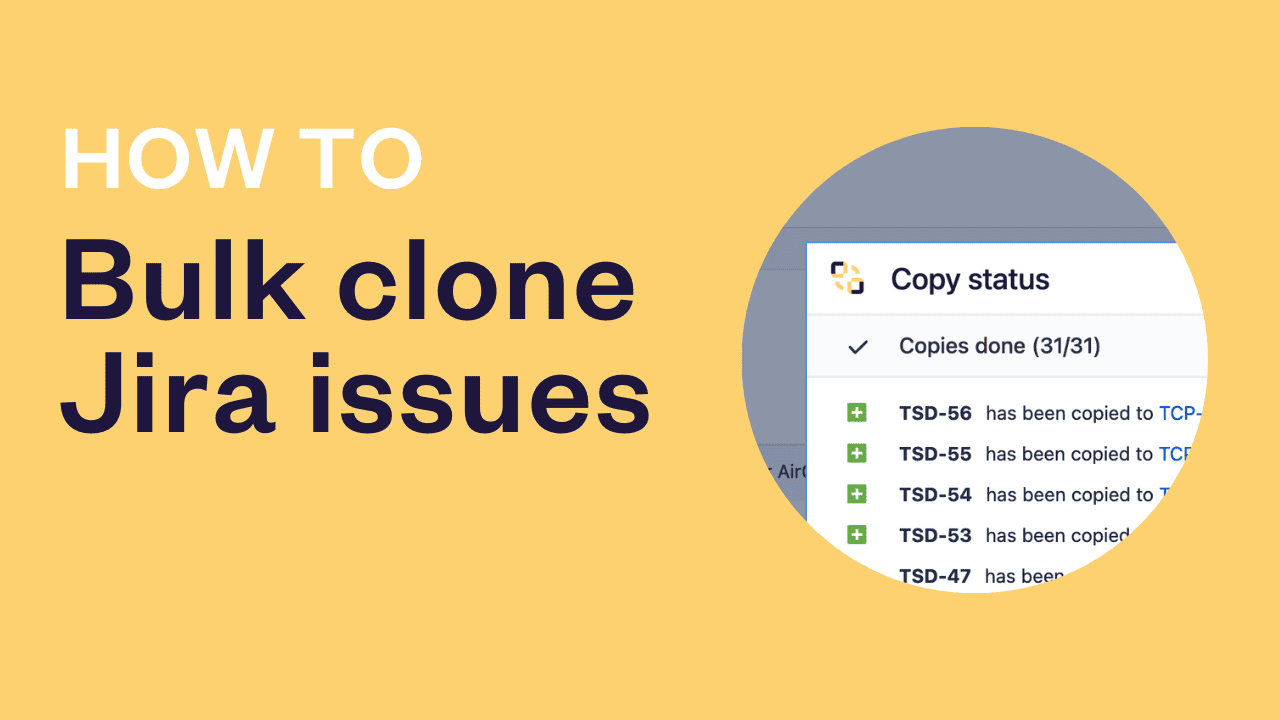
Streamline your process control by bulk cloning Jira issue templates
Bulk clone, clear, or change field values based on the target project
Synchronize changes between Master project issues and cloned issues


Bulk clone up to 1000 Jira issues at once

Have questions about bulk cloning Jira issues?
FAQ
Can I clone a project?
One app, 100+ use-cases


An efficient way to clone and move issues from Jira Service Management to your Jira Software project

Clone and move between Jira Service Management and Jira Software

Trigger on transition, or any Automation trigger
Synchronize comments or status from developers back to Jira Service Management


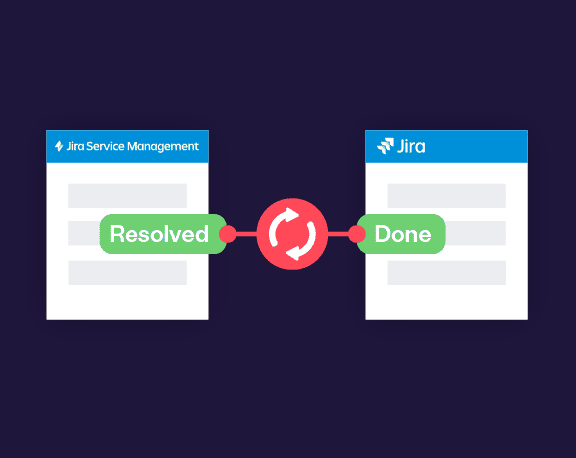
Synchronize the status of two issues
Have questions about escalating Jira issues from one project to another?
FAQ
Can I clone Forms?
One app, 100+ use-cases

Epic Management: the Benefits of Using Elements Overview

Improved Task Management and Dependency Tracking
Improved Efficiency and Timeliness

Use Overview and Copy & Sync to Streamline Issue Escalation and Resolution

Have questions about displaying issues in Epic?
FAQ
What kind of issues from the Epic can I display on my overviews?
What kind of information can I include from the issues in my overview?
https://doc.elements-apps.com/overview/app-configuration/overviews/content/compatible-field-types
One app, 100+ use-cases
Have you ever been faced to common customer support tickets that have already been solved but not documented? Or a piece of information missing to solve this incident, as the person possessing it is currently out of the office? Or even worse, a customer failing to find the answer he’s looking for while despite exploring the documentation?
Then you maybe be experiencing “IT knowledge management processes”-penia!
Worry no more, we have the right medicine for you.
By learning and implementing ITIL best practices for managing knowledge, you can quickly surface the information your customers or employees need to resolve their issues, fast, as well as empower IT teams to deliver great service experiences.
What is ITIL knowledge management process?
Simply gathering knowledge is not enough. ITIL knowledge management definition states that it should be used to build value, and provide the right information to the right people at the right time. ITIL 4 focuses on processes by saying WHAT should be done rather than HOW to do it. The goal is to create value and increase the efficiency of operations.
The ITIL Knowledge Management process is described in three main points:

Creating and maintaining a knowledge-sharing culture
It is necessary to create conditions in which all the employees understand what knowledge is for the organization and to give them the tools to create, use and transfer it.
In that sense, the ITIL Knowledge Management process includes:
- changing outdated patterns of knowledge use
- enabling the use and transfer of valuable knowledge
- strengthening the learning culture in the organization
- improving knowledge management practice
- identifying knowledge assets in the organization
On-demand information search
One main objective of this ITIL process is to find and provide new information in response to unusual queries, when using the available information systems and patterns it is not possible to obtain a meaningful answer.
Here are examples of scenarios where this process is used to reach that goal:
- Custom business analysis to verify the hypothesis
- Evaluation of a new technology or business model
- Management of complex and rare queries which have not been standardized or automated yet
Knowledge resource management
The process focuses on managing knowledge as a resource (knowledge assets) throughout its lifecycle and on its effective integration within the entire knowledge management environment in the organization. Knowledge assets can be collective and individual, structured and unstructured, implicit and explicit.
Examples of knowledge assets include records of incidents, documented issues and bugs, application source code, reports, design, and technical documentation, etc.
Read more about knowledge management in this ultimate guide: Knowledge Management – Best Practices Guide
Benefits of ITIL Knowledge Management
Why should organizations manage knowledge? For the same reason as humans. Organizations need to make better use of their most important resource – people’s knowledge – to turn it into a competitive advantage. Implementing an ITIL Knowledge Management process in your organization will bring several benefits:
Document answers to frequently asked questions to save agents’ time
Support agents usually have to deal with frequently asked questions. Losing time answering the same questions over and over again can be avoided by documenting typical answers and making them easily accessible. If you notice that a certain question comes up more than twice, it’s a sign that you should document the answer instead of letting your team waste time and resources dealing with it.
Empower customers to help themselves by searching for resolutions in the help center
By analyzing customer requests and tickets, you can find out what the more typical questions asked are, and in which words they are formulated. By properly including these keywords in your knowledge base articles, you’ll help the customer get access to articles perfectly matching their request and allow them to quickly find out the answer.
Gather customer feedback to develop more relevant documentation pages
Remember that knowledge also lies outside the organization. Customers using your products can show you a new perspective, find a previously undiscovered error, or even suggest a change. Stay aware of customer feedback to include it in your official documentation.
See how knowledge management can support your IT service practices.
Best practices when implementing an ITIL Knowledge Management process
Here are the seven best practices worth relying on when building an ITIL knowledge management process.
1. Focus on value
When creating articles in the knowledge base, you should focus primarily on the value they provide. The information should be precise and lead the user to solve their problem as soon as possible.
2. Start where you are
An organization is a living organism that is constantly changing. Therefore, any moment to start building a knowledge base is a good one. Don’t be intimidated by the amount of undocumented tribal knowledge that only exists in the minds of the longest-serving employees. The most important thing is to get started, the rest will happen along the way.
3. Progress iteratively with feedback
Documentation of larger processes should be divided into stages. Sometimes other people’s help can provide a fresh look at the documentation. Then the work should be done iteratively, i.e.: preparing a piece of documentation, submitting it for review, receiving feedback, and making corrections. The process is repeated until the document is finished.
4. Collaborate and promote visibility
The power of a knowledge base is the ability of many people to work on it at the same time. However, it is necessary to build awareness that the knowledge base exists, that it has a real value, and that by supplementing it we make our (and others’) work easier. We will then no longer have to solve problems previously solved by someone else.
5. Think and work holistically
Developing a knowledge-sharing culture is essential when implementing this process. Increase transparency with open and shared information instead of keeping documents siloed in emails and folders, or locked behind permissions settings. Invest in technology that connects and unifies knowledge, like Confluence. Knowledge should be easy to search, find, and create, for your entire organization.
6. Keep it simple and practical
The information contained in a knowledge base should be as simple and practical as possible to directly guide the user (customer, support employee) to solve the problem.
7. Optimize and automate
Automation can help you streamline requests without a support agent needing to be called upon every time a new ticket or question comes up. Providing self-serve resources from your knowledge base, as well as keeping track of common requests and resolution processes automatically, can save you and your team time.
How to implement ITIL Knowledge Management with Atlassian tools
Keeping ITIL knowledge management best practices in mind, let’s see how you can implement them and build an up-to-date knowledge base to ease the work of support agents and help customers as well.
If you work with the Atlassian stack on a daily basis, the natural choice will be to use Confluence. In combination with Jira Service Management (JSM), you’ll get an easy-to-use and functional tool for creating and managing a knowledge base.
Building a knowledge base with JSM and Confluence
Follow this step-by-step tutorial to build a knowledge base with JSM and Confluence from scratch:
1/ If you don’t already have a JSM Project for your support portal, you can create a new one by going into Projects > Create Project > and choosing Service Management type.

2/ Creating a linked Confluence space
After the JSM project creation, the relevant Confluence Space should be automatically created and linked to the project. If you want to create another space go to Confluence, choose Spaces > Create a space > Knowledge base.

3/ Verifying the linking and permissions
Go to Project Properties Knowledge Base. If the space is already linked with the project, you will see the list of articles there. If it’s not the case, or if you wish to link other spaces, click on “knowledge base settings”.

There you can link the space by clicking on the “Link Space “button.

At this point, you can also verify permissions for the Space. If the Knowledge Base is intended to be used by customers, you should allow All logged-in users to view it.

4/ Adding the article from the issue view
Now you can add an article from the issue view. Click on “Knowledge base” on the right side of the issue and on “Create article”.

5/ Adding the article from the project view
Go back to Project Properties Knowledge Base (cf. point 3) and create a new article. Once created, you will also get the link to share it with a customer.
6/ Letting customers access knowledge base articles
Customers can find knowledge base articles as well by typing his/her request in the Customer Portal. Suggested articles matching his query will appear below.

What if knowledge-building could happen automatically?
Let’s imagine a support agent closes the incident reported by a customer, and just a moment later a new document is automatically published in Confluence gathering information on the request about how it has been resolved. This is where Elements Publish comes into play. This app for Jira Cloud lets you automate manual tasks and make knowledge base building fast, fun, and effective.
Building a knowledge base automatically with Elements Publish
Let’s take the use case of an Incident that has been solved and closed on the support portal.
In a well-defined ITIL Knowledge management process, a knowledge base page should be created, usually in Confluence, to store information on the incident and how it has been resolved, to consolidate knowledge and make it accessible to all. This task may be time-consuming, and it can be automated using an app like Elements Publish for Jira Cloud.
Several conditions must be fulfilled:
- make it possible to create an article in the knowledge base based on a solved task
- the document should be created only for Incident tasks that are resolved with the Done status
- the document should be created in the Knowledge Base space and a link to it should appear in the task
- the document should include the date of closing the task and its labels
- the attachments should be copied to the newly created page
- a document can only be created by the person assigned to the task
All these conditions can be implemented with Element Publish by creating a unique recipe, that, when triggered, will automatically create a page in Confluence, gathering all key data on the incident.
Interested in learning how to create Confluence pages automatically from JSM tickets? Take a look at our use case below:
You probably know the age-old axiom: knowledge is power.
This might be true, however, it comes with a few conditions.
First, you need to have a way to access knowledge. Easily and quickly if possible. Also, this knowledge must be accurate, and it must be used the right way. Unfortunately, in the workplace — these 3 conditions can hardly be met. And it can be incredibly costly to a business.
That’s why managing knowledge the right way is key to a company’s success, and we’ll help you here by providing knowledge management best practices and tips to choose the best knowledge management system for your company’s needs.
What is knowledge management?
First, what is knowledge?
Let’s begin with the Cambridge Dictionary definition: knowledge is the “understanding of or information about a subject that you get by experience or study, either known by one person or by people generally”.
Two important notions here: first, the fact that knowledge can be acquired not only by study but also by experience, and that it can be known not only by one person but by people in general. In that sense, the experience and skills gained by a collaborator across the years are aimed to be shared across an organization. A typical example would be the onboarding of a new employee, a time when it is essential to transfer the company’s knowledge and practices.
What is knowledge management and why it’s important?
As defined by Atlassian, “knowledge management is the process of creating, curating, sharing, using, and managing knowledge across an organization”.
Knowledge is one of the greatest assets of an organization. When an employee leaves the company and the knowledge acquired by this person has not been stored or passed along to others, it constitutes a high risk of information loss for the company.
Knowledge management’s goal is to maintain all the company’s learnings and history and make it easily accessible to all.
This is even more crucial nowadays, with teams working from everywhere with different schedules and across different time zones. Going to the desk or office next door, and tapping the shoulder of your colleague for information might not be possible anymore. All team members must be able to asynchronously share their knowledge and learnings and get access to it whenever and wherever they are.
What are the benefits of knowledge management?
Half of all respondents in a recent survey conducted by Deloitte identified knowledge sharing as a key driver to team success. From offering a single source of truth to improving collaboration and productivity, managing knowledge efficiently can be highly beneficial for companies and teams.
Better collaboration & team communication
Effective knowledge management is the path to successful knowledge transfer. Sharing learnings across teams and team members prevents company silos and enhances communication throughout your organization. It fosters collaboration as people are more aligned, have clearer goals, and have more transparency in their work.
Single source of truth & high-quality data
Having multiple tools to store information usually leads to time loss, looking for what you need, duplicated data, or outdated information. To have a single, reliable source of truth where everyone can find the information they need, is one of the main goals of knowledge management. It gives efficient access to knowledge as well as improved quality of information.
Improved productivity
According to a McKinsey study, employees spend nearly 20% of their time searching for the information they need to do their jobs. With an effective system to share knowledge and information, productivity could be improved by 30 to 35%.
Faster decision-making
To give the right information to the right people at the right time. That’s the key to making more informed and data-driven decisions. When information is shared transparently across the entire organization, everyone has the tools to work toward the same goals.
What are the main types of knowledge management?
Explicit knowledge

Explicit knowledge is the most apparent form of knowledge: it includes any formalized documentation, written processes, or reports. Everything that is easy to write down and pass along.
Explicit knowledge is usually the first and the easiest type of information you can store and make accessible to your team. The challenge here will be to keep it accurate and up-to-date.
Examples of explicit knowledge: reports, formalized processes, product documentation, and technical user guides.
Implicit knowledge

Implicit knowledge is the practical application of explicit knowledge to a specific situation.
For example, if explicit knowledge is the user guide of your new camera, implicit knowledge will be gained when you apply that information in order to take beautiful portrait pictures.
It can be hard to capture and document, as it’s, essentially, learned skills or know-hows.
Examples of implicit knowledge: best practices and how-tos
Tacit knowledge

Tacit knowledge is the knowledge that is gained from personal experience.
Think of your grandmother’s famous recipes. It is usually never written down. She just knows how to cook them from the thousand times she already did it. Which quantity of flour to add, the right way to mix the ingredients together, the exact time in the oven… You will have a hard time learning how to make those, as this knowledge is based on experience and intuition.
As tacit knowledge is intangible information, it becomes really difficult to write it down and explain it in a straightforward way.
Examples of tacit knowledge: how to speak another language, cultural traditions, and customs, missions like sales or leadership where complex social skills are involved
Your organization’s ability to capture and retain all types of knowledge is at the same time essential and challenging. But once mastered, it can represent a huge competitive advantage.
Knowledge management best practices
Knowledge is one of your organization’s most valuable assets. But only if managed efficiently. Here are 5 best practices we recommend to get better knowledge management.
1. Aggregate your team’s knowledge in a single system
To democratize knowledge, companies first need to centralize it in a digital information hub, usually called Knowledge Management System (KMS). The goal is to avoid having information scattered across different tools, or in your colleagues’ minds. Choosing the right system is important, so we prepare a list of questions to ask yourself when choosing a knowledge management system, available at the end of this article.
2. Increase transparency with open and shared information
Preventing company silos has become more and more of a challenge with the COVID-19 pandemic’s scattering of staff among homes and work sites, and even across different countries and time zones. Increase transparency in your company by providing open and easy access to knowledge, and encouraging team members to collaborate and share information.
3. Make information fun & easy-to-consume
Prioritize brief articles and FAQs to long articles and procedures (you don’t want the acronym “TLDR” to be used to describe your content). Share your information in a user-friendly way to that readers will be eager to read it. As you know “a picture is worth a thousand words”, so don’t hesitate to use images and graphs to convey your message. For instance, at Elements, we create sprint posters for each development sprint to illustrate its main objectives. Atlassian also suggests creating a project poster for every major initiative, to share your goals and progress with the rest of the team and stakeholders.

4. Foster a knowledge-sharing culture
Faris Behme and Sandy Becker of Deloitte explain that “in the context of generating, sharing, and managing knowledge, organizations cannot underestimate the human factor.” If team members don’t have the will or the motivation to share knowledge and information, even the best platforms and tools will be useless. Enable employees on knowledge management best practices, and foster a knowledge-sharing mindset so that they recognize the value for themselves and for the company.
5. Measure and improve continuously
Don’t let your KMS gather dust. Adopt a “kiwi gardener” attitude to keep it clean and up-to-date so that it continues to be a relevant and valuable resource for employees. Measure user engagement and participation in knowledge transfer, and run regular audits to check if the platform and knowledge management processes are still aligned with user needs.
Choosing a Knowledge management system
It is no coincidence that we listed “Aggregate your team’s knowledge in a single system” as the first position in our knowledge management best practices. As Nate Martins from Notion says, “without a system, knowledge isn’t tangible. It lives in employees’ heads.”
But before jumping into selecting the software for your knowledge management system (KMS), you must consider several elements, from administration capabilities to usability and user experience.
Here are the key questions to ask yourself to make the right choice for your KMS:
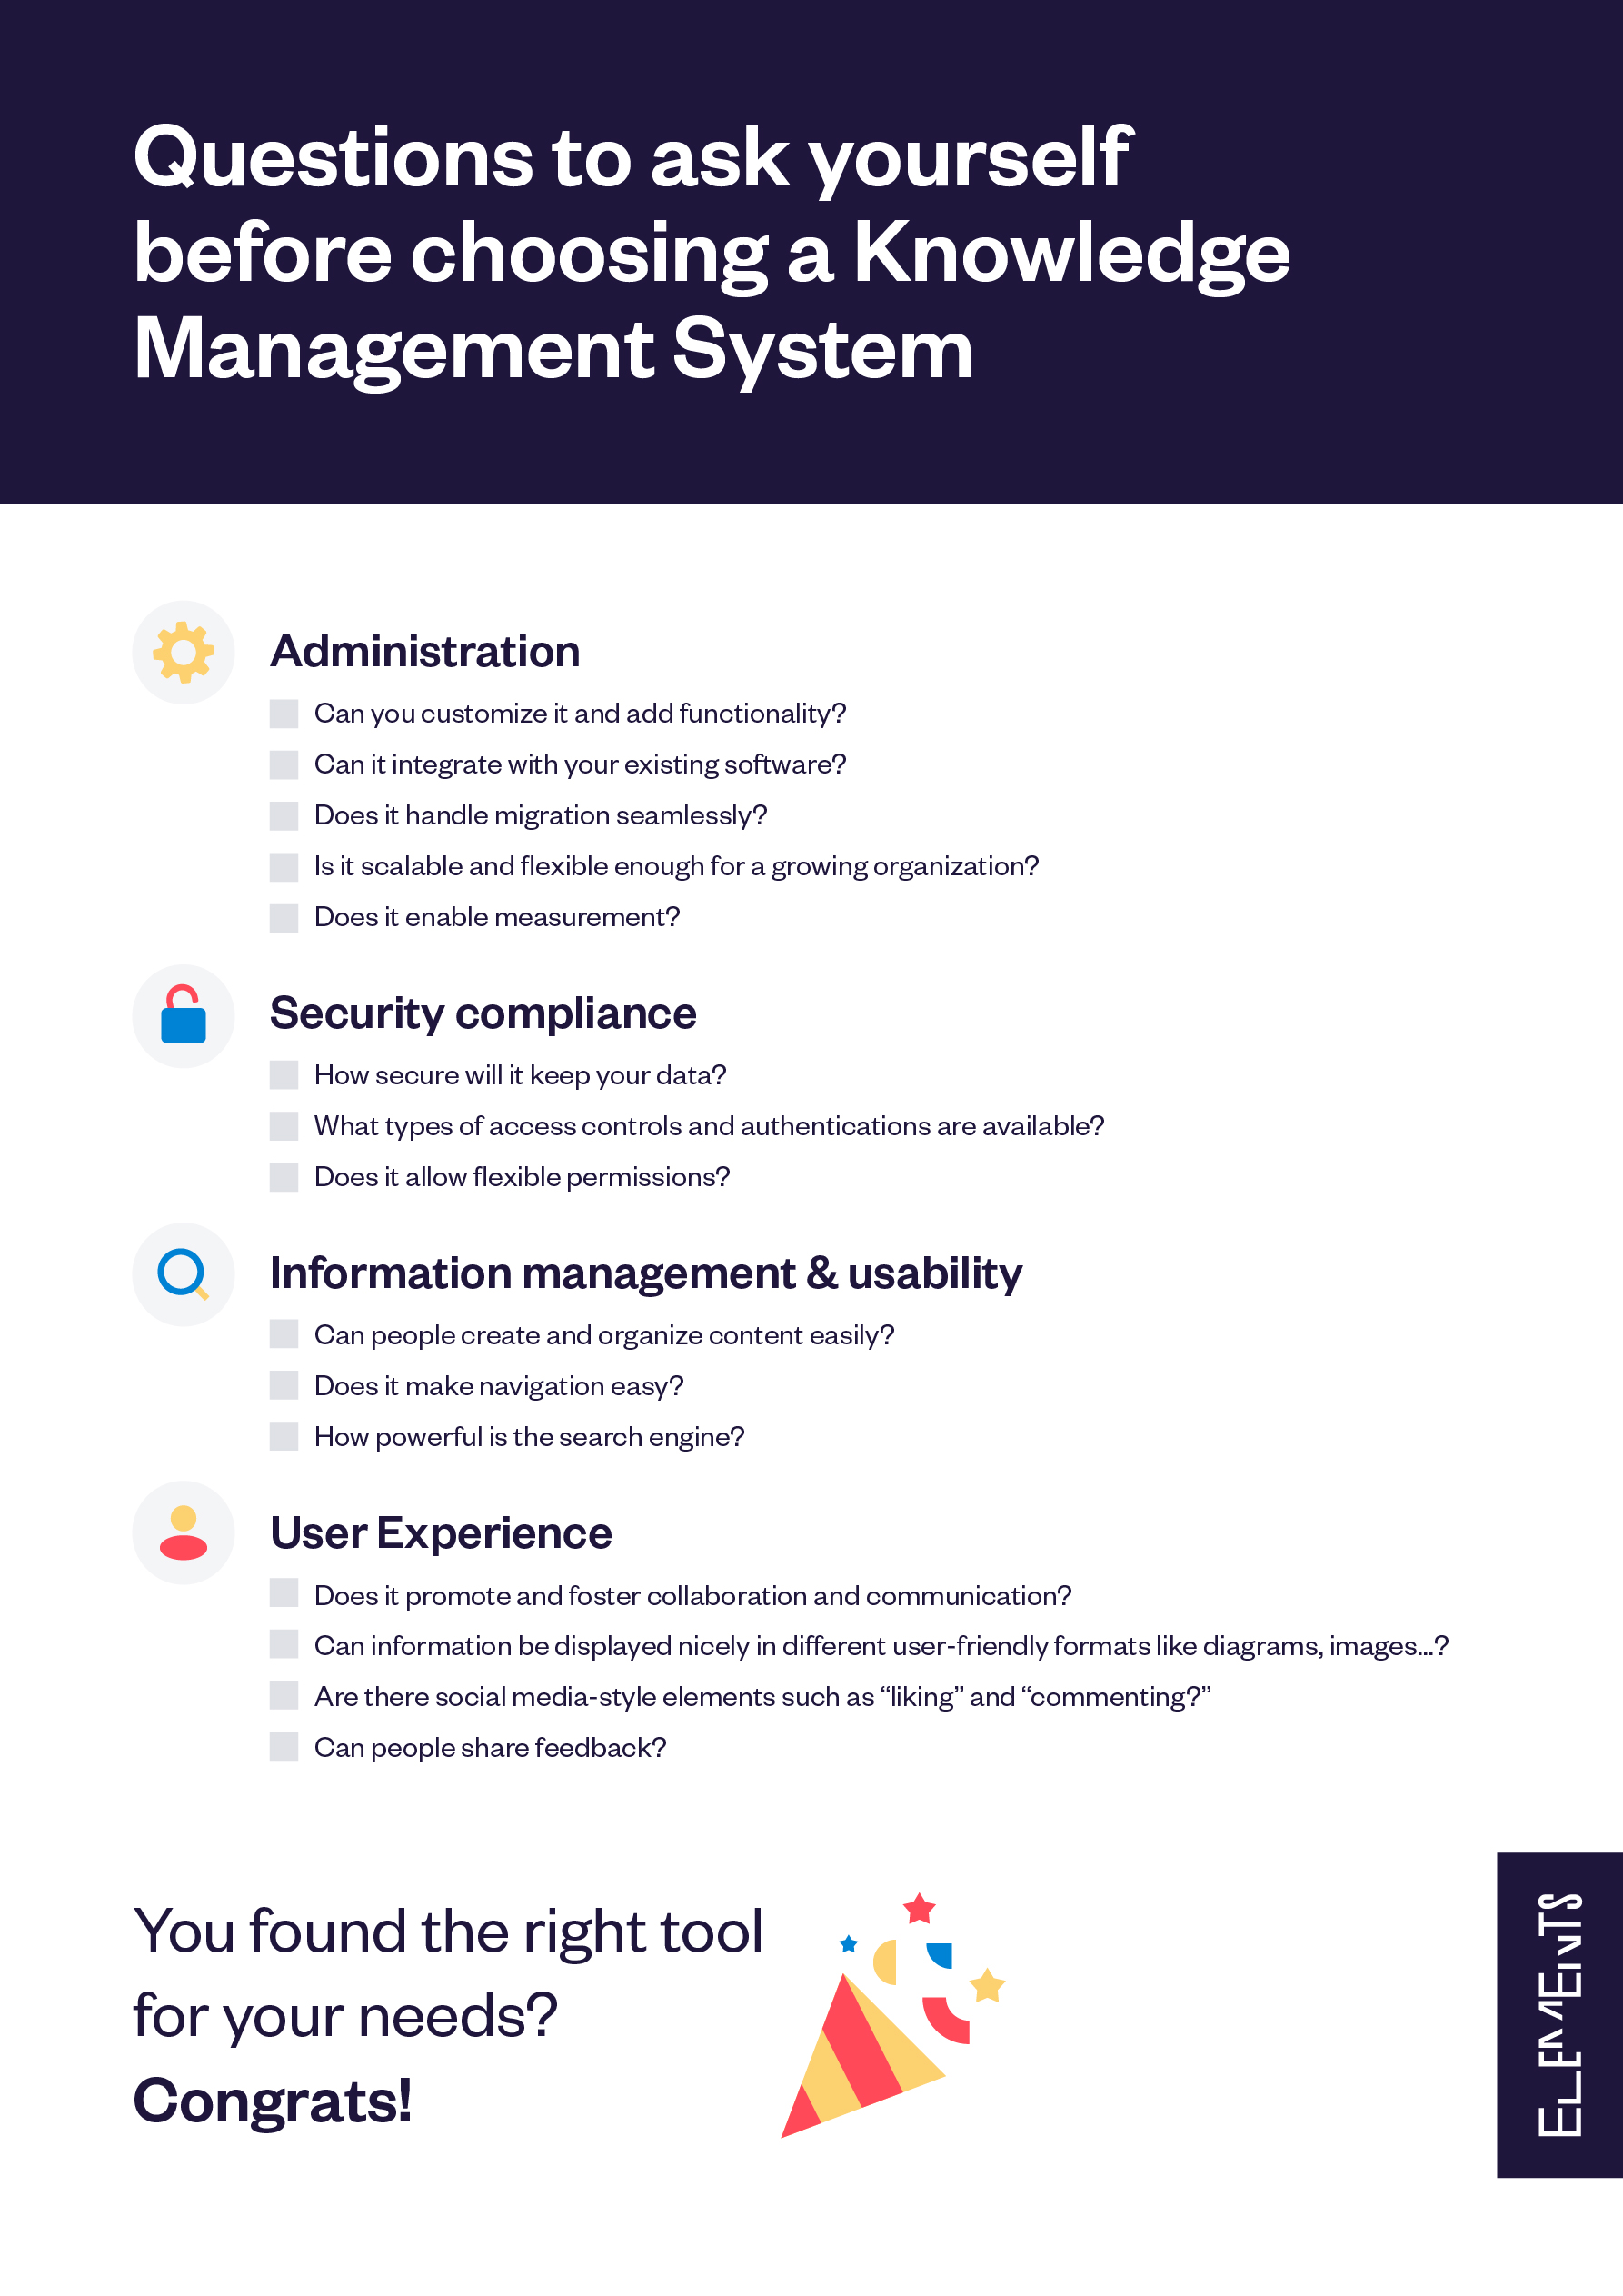
Download this checklist here, to help you choose your KMS.
Atlassian tools for knowledge management
Several software can be used for knowledge management. From more generic ones like Notion or Monday, to specific ones like Document 360, Confluence, or Tettra, the offer is wide.
If you are already using some tools from the Atlassian suite (like ourselves), such as Jira Software or Jira Service Management, getting Confluence can be a great addition to manage knowledge and link your tools together.
With easy content creation, organization, and a powerful search engine, Confluence provides an accessible platform for knowledge management. Also, combined with Jira Service Management when used for customer support, for instance, it can offer a self-serve knowledge base so that customers find themselves the answers to common questions, without having to create a new ticket.

To go further and learn how to implement knowledge management best practices with Atlassian tools, check out our article on how to create a knowledge base article in Confluence directly from a Jira ticket.
Remember when you were a small kid, this moment when you graduated from four-piece puzzles to bigger canvases?
Elements evolves. We’ve redesigned our apps logos to reflect the maturity of our offerings, while keeping our iconic visual system based on primary shapes that evokes the idea of elements you assemble together.

We get a similar feeling of excitement with this new refreshed look! It reflects how Elements has grown and matured over the past four years, tackling challenges such as going Cloud-first, elevating our performance and security standards, bringing new exciting features to our customers…
We designed the new logos with the goals that they convey meaning about what each app does, and can be easily differentiated from one another.
Connect’s functions like a magnet.
Copy & Sync’s evokes the concepts of reflection and synchronisation.
Spreadsheet’s represents a sheet and cells
Publish’s conveys the idea of document publication.
We look forward to the years to come, and remain passionate about bringing the missing pieces to your Atlassian puzzle so your teams are more efficient and delighted.

Leverage asset information that’s already stored in a CMDB

Guide Jira Service Management customers through the ticket creation process

Help support agents identify important information at a glance

Choose which data from your CMDB is visible by customers or by agents only


Use a local Jira project as a light-weight asset manager

Have questions about bringing data from a CMDB into Jira?
FAQ
What CMDBs can I use with Elements Connect? Can I get data from ServiceNow?

Change Management is one of the four ITIL modules supported by Jira service projects. To implement it successfully, you need to set up workflows that support existing best practices. In this article, we will cover just that: what is a workflow in Jira, how to set it up so that it supports the change management process and how to enhance it for a better experience.
Change management process in Jira Service Management (formerly Jira Service Desk)
A typical change procedure consists of five to six steps:
- Creating the change: Who raised it, the reason for it, which area it impacts and the priority it has
- Reviewing the change: Is the request complete, relevant, and correctly filled out?
- Assessment: What is the cost, benefit, risk and scope? Is it justified and what impact will it have?
- Implementation: Actually introducing the change on relevant assets
- Review: Was the change successful?
- EXTRA – Retrospective: What can we improve next time?
Atlassian has also nicely summed the procedure up in this article. You implement this into Jira through a workflow. But exactly what is a workflow in Jira?
Simply put, it’s an ordered set of steps necessary to complete a task. The steps are represented by statuses, and the order by transitions between statuses. For example, this is a very simple three-step workflow.
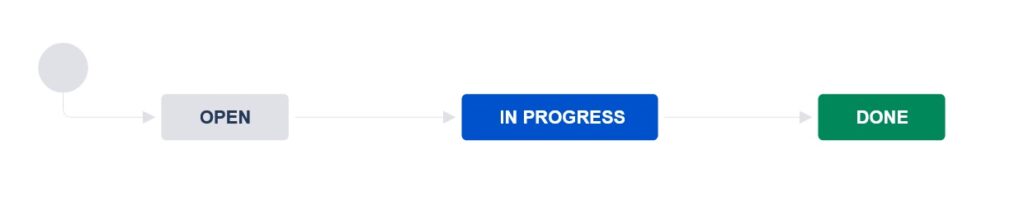
Open, In progress and Done are statuses, while the arrows pointing between each are transitions.
That said, what should you do to implement a change management workflow? It’s simple: transform the theoretical change management process into concrete Jira statuses and transitions!
Setting up change management workflows in JSM
Let’s present two possible ways you might want to approach this. A simple tracking of changes and a “true” ITIL change management.
Workflow 1: Simple change tracking
The first approach is for small teams that don’t need to adhere to a strict ITIL method, but they could definitely benefit from implementing a simple change management process in their Jira – they would see who requests, approves and implements which tickets and steer the whole procedure in the right direction.
For such a straightforward use case, they could use a workflow like this:
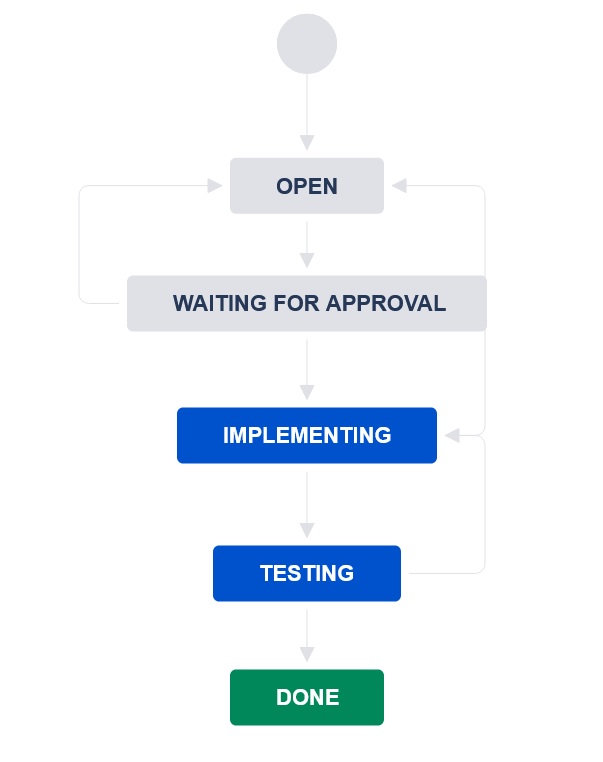
Workflow 2: ITIL Change Management
In case you’d need to configure a more robust solution, you could use the IT Service management project template. By default, a “Jira Service management change management workflow” is included in it, and looks like this:

This is the Cloud one; on-premise, it’s very similar. It has all the necessary change management steps, including various outcomes. The best part is that this is only a workflow template that you can adjust however you see fit. So how would you do that?
Editing workflows
This approach works if you already have a project created and you’d like to change its existing workflow. First, you need to having global admin privileges. In the project where you want to adjust the change management workflow, explore the project settings. Find the workflow you want to edit.

Choose the pen icon next to its name to enter the edit mode and display the workflow diagram.

To introduce a new status, choose the “Add status” button on the top left side of the editor. Once you add it, connect it to the workflow by choosing and dragging one of the circles on the status and dropping it to another one, as in the picture below. This way, you create a one-way transition.

If you want to remove a status, select it and choose “Remove status” on the right side.

Finally, you would save the workflow by choosing “Publish” at the top of the page.

Novice admins should modify existing workflows than create new ones, as they contain many detailed settings that you would need to keep in mind when creating a new workflow from scratch, such as automatic resolution screens, different notification events and proper workflow schemes.
In this article, Atlassian described several directions this default change workflow can take depending on the type of the created change, its risk and priority.
Emergency changes are those that need to be assessed and implemented as quickly as possible, and their process is shorter. Standard changes are frequent operations that have a pre-established procedure that needs less planning and approvals. Finally, normal changes require significant planning and assessing, as they cover important changes.
To use the default change management workflow to support these operations, you can either “hardcode” the three types of directions with Conditions depending on issue field values, or simply keep the workflow open for all change types.
Tips to improve change management workflows
Connect Jira to your asset management tool
Connecting changes to the relevant assets and stakeholders is key to successful change management.
Linking a Jira change ticket with the impacted asset helps both reporters and agents, by making the process simpler and adding the necessary context and a historical record that a change ticket had affected the device.
Now how to connect Jira to your Asset Management tool?
The Asset Management solution offer is wide: from Atlassian’s Insight (part of Jira Premium offer), to external CMDB (configuration management data base) and ITAM (IT Asset Management) tools.
If you are using Insight, you can add an Asset field from Insight on the Jira issue create screen (or a transition screen, depending on how complex your workflow is) to link the change with the asset. For external tools, you can use the app Elements Connect to retrieve data on your assets and populate Jira custom fields with it.

Set approvals automatically from the right stakeholders
Every asset usually have a responsible team or person that takes care of it. This stakeholder may be the approver for necessary changes. Or perhaps a Change advisory board (CAB) needs to approve the change.

Being able to automate the approval process and assign automatically the ticket to the right stakeholders can save a lot of time and repetitive work. To know more on how to get approvals automatically from the right stakeholders and set the assignation automatically, read this article.
Set your change management workflows up for success
Implementing a change management process in Jira is simple; you don’t have to start big. Try running your changes through a simple workflow like the one we proposed above, or leverage the Jira Service Management change management workflow provided with the default template. Modify it as you see fit, and remember that apps like Elements Connect can save you a lot of repetitive work.
Fetch user details from Azure AD to automatically triage requests

Integrate Azure AD with Jira and fetch key reporter details

Automatically triage request to location-based queues

Customize where and how you display Active Directory information


Organize issues into location-based queues based on the Azure AD