


Elements Copy & Sync vs. Jira Automation: Which one scales with you?
When managing complex processes in Jira, automation is essential. Atlassian’s Jira Automation feature promises a no-code approach to repetitive tasks, but when real-world use cases demand cross-instance cloning, syncing custom fields, and maintaining transparency, its limitations begin to show.
That’s where Elements Copy & Sync comes in a powerful extension to your Jira toolbox. Let’s break down why this purpose-built app may be the better fit for your workflows, especially when scalability, simplicity, and reliability are non-negotiable.
Automating workflows in Jira: the basics
Jira Automation is a native feature in Jira that lets users streamline their work by setting up rules to automatically trigger actions, like updating fields, sending notifications, or transitioning issues. It’s designed to help teams save time and reduce manual effort with a simple, no-code interface.
Elements Copy & Sync is an Atlassian marketplace app built to make issue cloning and synchronization seamless. Whether it’s copying entire epics, syncing support tickets across teams, or templating full project structures, Elements Copy & Sync gives users a flexible, intuitive way to automate complex workflows. With recipes that define what to copy and when, teams can stay aligned and efficient without writing a single line of code. It’s automation that simply works, regardless of how complex your data or structure may be.
1. Scaling beyond the limits of Jira Automation
One of the most common roadblocks users face with Jira Automation is the execution limit. On Free, Standard, and Premium Jira plans, automations are capped. When those credits run out, your automation stops running potentially leaving critical workflows frozen mid-process. Only Enterprise users enjoy unlimited executions, but not every organization is ready for that level of investment.
Read about Jira Automation limits
In contrast, Elements Copy & Sync offers unlimited cloning and syncing actions across all tiers. Whether you’re escalating support issues, syncing tasks across projects, or duplicating large hierarchies of issues, you won’t be punished for high usage. And most importantly, your work won’t grind to a halt due to automated process limits.
2. Simplicity that saves time
While Jira Automation offers a robust rule builder, the complexity ramps up fast. Implementing an issue escalation, for example, can require up to 10 separate rules just to synchronize key fields like comments, status, and priority. Each rule is an opportunity for something to go wrong and for valuable time to be lost in debugging.
Elements Copy & Sync solves this with simplicity. A single recipe can replace multiple automation rules, with an intuitive UI that even non-technical users can handle. No scripting, no advanced Jira training just click, configure, and go. That means more time spent on meaningful work, and less on managing automation complexity.
3. Cross-instance cloning without the pain
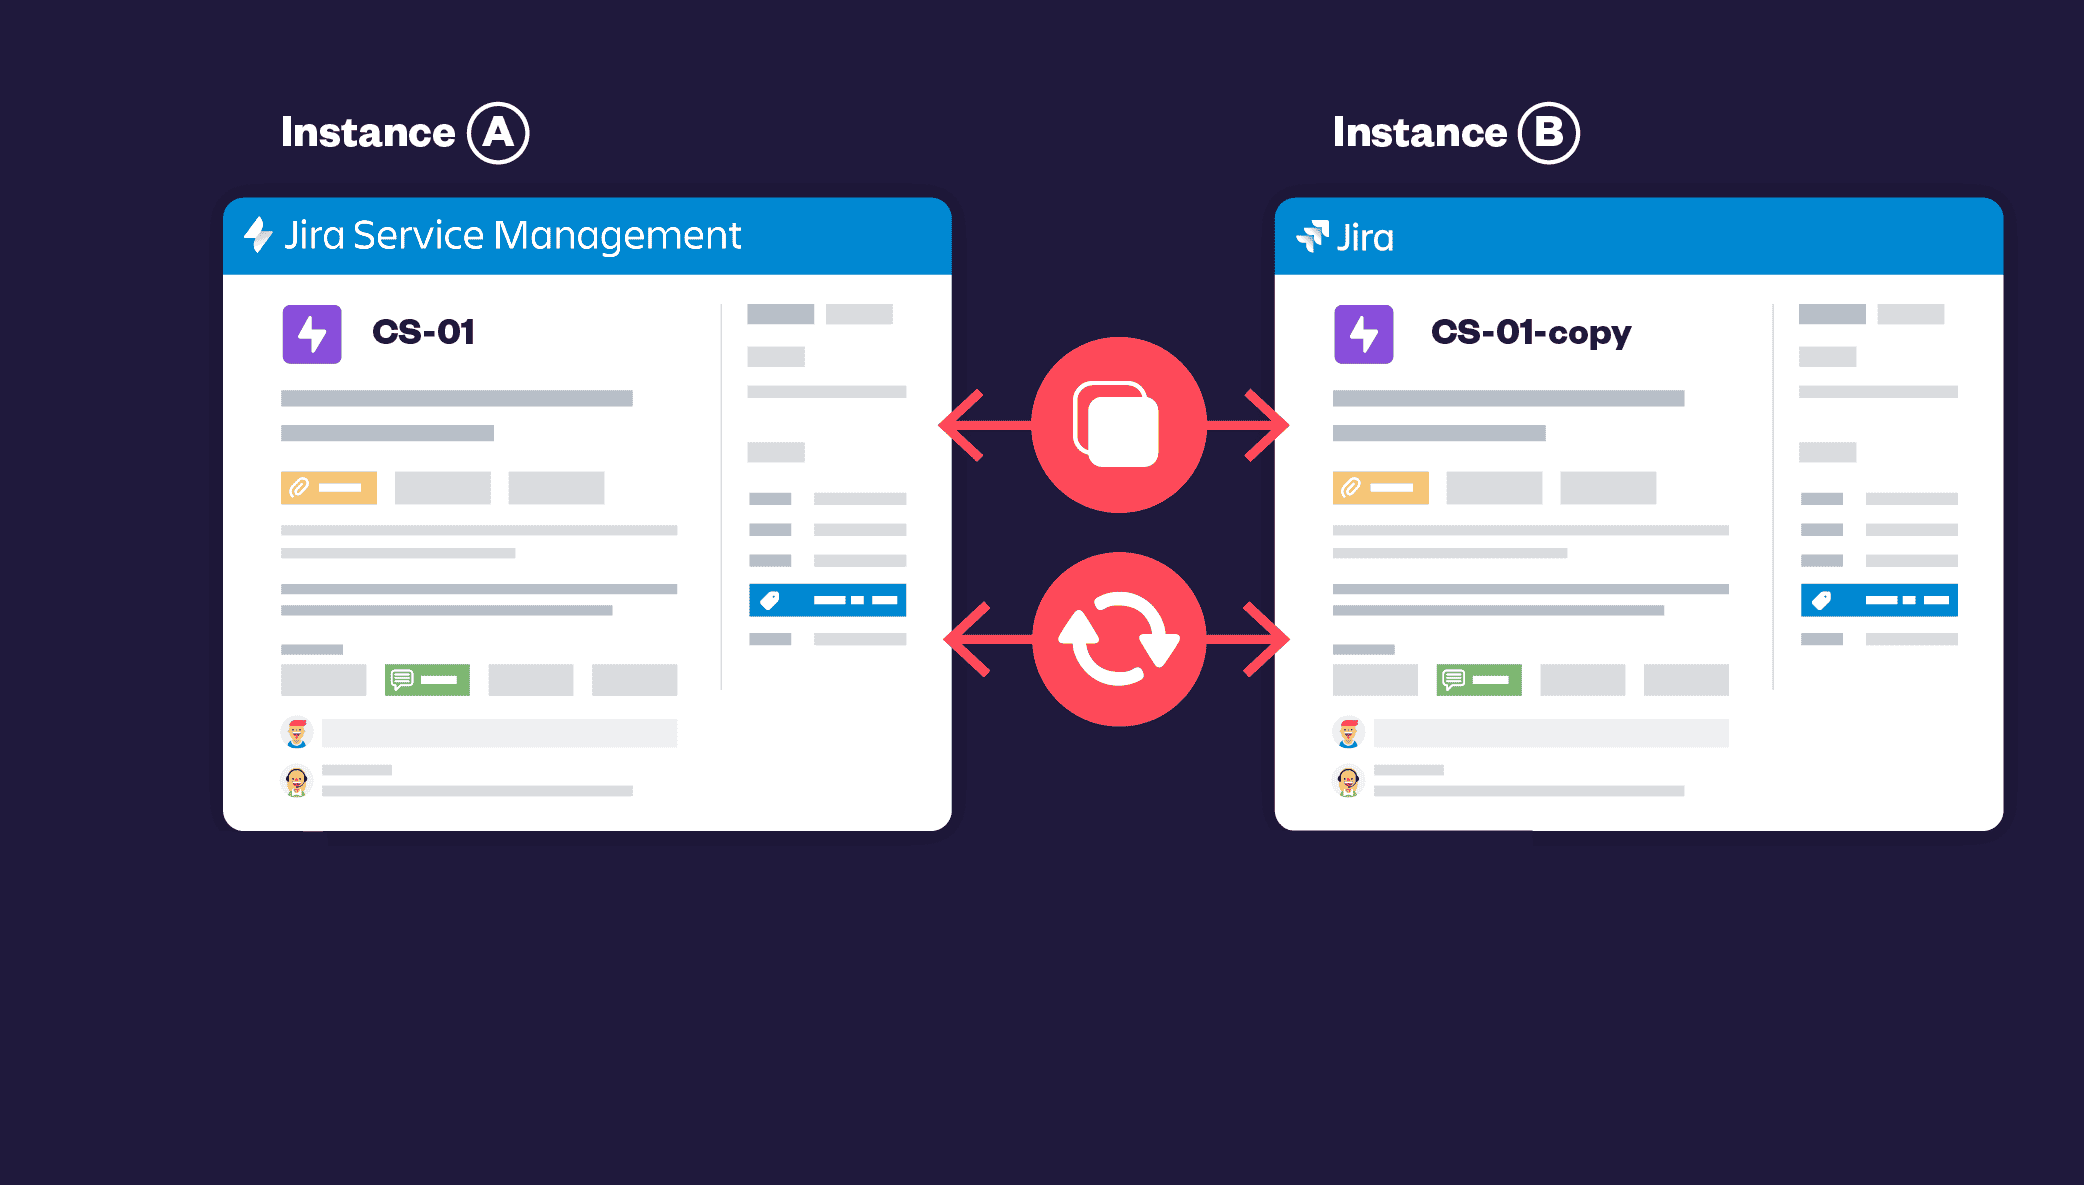
One of the biggest limitations of Jira Automation is its inability to natively support cross-instance operations. If your teams span multiple Jira instances, setting up workflows between them requires manual webhooks, API scripting, and duct-tape-level creativity.
Elements Copy & Sync supports cross-instance cloning and syncing out of the box. Whether you’re working with external contractors or managing separate dev and support environments, this feature turns a daunting task into a drag-and-drop setup. Your work continues seamlessly, no matter where the issues live.
Discover how to clone issues across separate Jira instances
4. No more field frustrations
Advanced use cases often break down when you try to clone complex issue field types with Jira Automation. Comments, attachments, and custom fields either require advanced JSON editing or fail entirely. That might be fine for developers but not for project managers, support teams, or IT agents who just need things to work.
Elements Copy & Sync supports all standard and custom fields, including comments and attachments. What’s more, it ensures the data is copied cleanly and completely, preserving context and auditability. Your workflows stay accurate, and your data remains trustworthy.
Check all the fields can be cloned
5. Clean recipes vs. rule chaos
One of the hidden costs of Jira Automation is maintenance. As your rules grow in number and complexity, they start interfering with each other triggering unintended automations and becoming harder to debug. Over time, what started as a clean automation setup turns into a fragile web of dependencies.
Elements Copy & Sync avoids this entirely. Recipes are isolated, transparent, and easy to maintain. There’s no rule interference, no event loop surprises just clear, reliable behavior that scales with your team’s needs. You can continue building new automations without worrying about breaking what already works.

6. Real use cases, ready to go
Let’s take a look at a few issue-based scenarios:
| Use Case | Jira Automation | Elements Copy & Sync |
|---|---|---|
| Issue escalation | ⚠️ Requires 10+ rules, counts as multiple executions | ✅ One recipe, unlimited use |
| Cross-instance workflows | ⚠️ Manual scripting and webhooks | ✅ Native support, no code |
| Issue templating | ⚠️ Two or more complex rules | ✅ Simple setup with hierarchy preserved |
| Bulk cloning (100+ issues) | ⚠️ Technically feasible but fragile | ✅ One-click operation |
| Syncing comments & attachments | ⚠️ Needs advanced setup, often unreliable | ✅ Fully supported natively |
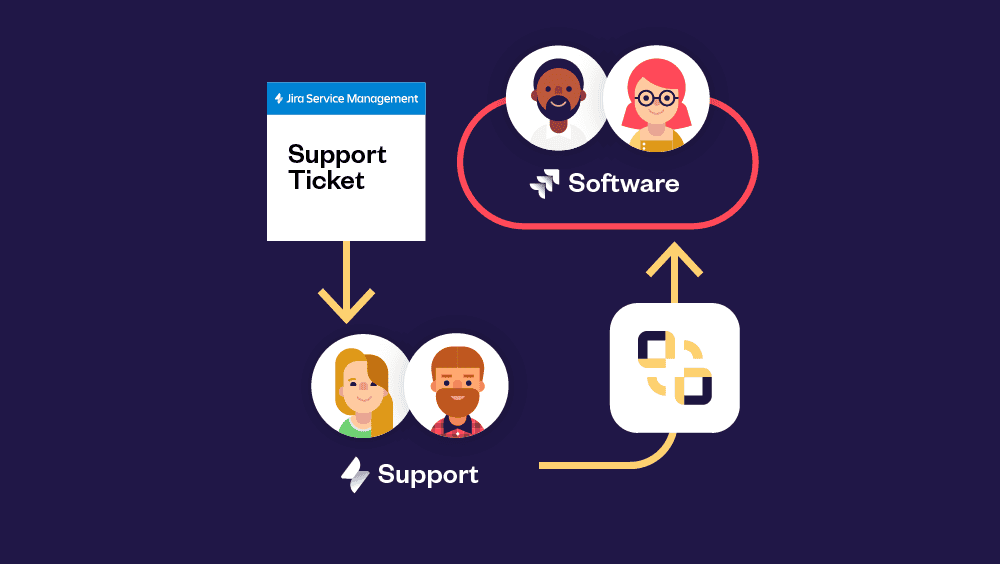
One of the most common and valuable use cases is issue escalation for instance, when a customer support task in Jira Service Management needs to be escalated to the development team in Jira Software. With Jira Automation, implementing this requires a series of interconnected rules: one to clone the issue, another to link it, and additional rules to synchronize fields like priority, status, or assignee. If you want to sync comments as well, you’ll need separate rules that rely on smart values and JSON scripting, which can become fragile and difficult to maintain over time.
With Elements Copy & Sync, this entire escalation flow can be handled by a single recipe in the app. You define what fields to clone, which project the escalated issue should be copied to, and whether updates like comments or status changes should stay in sync. It’s a plug-and-play solution designed for support and development teams to stay aligned without the need for a Jira admin or automation expert to manage and troubleshoot it.
Read more on how to escalate an issue with Elements Copy & Sync
7. Overcoming marketplace concerns
It’s true: some companies hesitate to install marketplace apps due to concerns around data residency, compliance, and security. Jira automation, being native to Atlassian, has fewer adoption barriers.
But Elements Copy & Sync is built with enterprise-readiness in mind. It supports secure configurations, respects data governance, and is trusted by some of the world’s most regulated industries. The app is also Cloud Fortified and SOC 2 Type II certified, ensuring the highest standards of security, compliance, and reliability for teams operating in regulated or enterprise environments.
8. Pricing considerations
While Jira Automation is included in all Jira plans, heavy usage on lower tiers can lead to unexpected costs or worse, broken workflows once you hit your limit. Elements Copy & Sync may involve a licensing cost, but you get predictable, unlimited usage and a toolset designed to scale with you, not against you.
9. A trusted choice for ITSM teams
From IT agents handling service escalations to project managers managing epic hierarchies, Elements Copy & Sync brings clarity, control, and power to teams who live in Jira every day. Whether you’re building workflows across teams or replicating consistent project structures, this tool makes it easier to get your tasks done accurately, and at scale. While Jira Automation tries to cover everything with general-purpose tooling, Elements Copy & Sync is purpose-built to solve real, recurring Jira pain points.
10. Conclusion: when to choose Elements Copy & Sync over Jira Automation
| Strengths | Elements Copy & Sync | Jira Automation |
|---|---|---|
| Easy configuration | ✅ Set recipes in a few minutes without technical skills. | ⚠️ Requires technical skills to make it work for complex workflows. |
| Scalability | ✅ No limits in the number of recipe runs. | ⚠️ Limited executions for Free, Standard and Premium. No limits for Enterprise. |
| Cloning of complex field types | ✅ Clone a wide range of fields including comments and attachments. | ⚠️ Fields like comments aren’t fully supported, and attachments may fail to copy. |
| Synchronization | ✅ One or two-way sync available. | ✅ Can synchronize work items. |
| Cross-project cloning & sync | ✅ Clone and sync across any Jira and JSM project. | ⚠️ Pretty hard to implement and to maintain. |
| Cross-instance cloning & sync | ✅ Clone & sync across separate instances. | ⚠️ Cross-instance workflows involves manual webhook setups and scripting. |
| Pricing | ✅ Per tier app cost. | ✅ Free but actions are limited in Free, Standard & Premium. Need to upgrade to Enterprise to avoid limits. |
| Security | ✅ Cloud Fortified, SOC 2 Type II, Data Residency. | ✅ Atlassian native feature. |
| Support & assistance | ✅ Detailed documentation. Dedicated partner Manager & support in US and Europe time zones. | ⚠️ Atlassian Community and documentation but hard to find the information. |
Use Jira Automation when:
- You need simple task automation
- You’re on an Enterprise plan
- You’re only working within a single instance
Choose Elements Copy & Sync when:
- You need reliability across multiple Jira instances
- You want to eliminate execution limits
- You value simplicity, even for complex operations
- You manage hierarchical templates, escalations, or external collaborations
At the end of the day, Jira Automation is powerful but it’s not perfect. If you’re ready to take your Jira workflows to the next level, Elements Copy & Sync offers a scalable, reliable, and user-friendly alternative.
Try Elements Copy & Sync for free for 30 days
In large organizations, support and development teams often work in separate Jira instances. When an issue requires escalation from customer support to development, ensuring smooth communication and data synchronization is essential. This is the type of situation where Elements Copy & Sync comes into play, enabling teams to seamlessly clone Jira issues between instances.
In this article, we’ll walk through the process of escalating an issue from a Jira Service Management (JSM) instance to a Jira instance and explain how to automate the process.
Scenario: A cross-instance issue escalation
Let’s consider a company, Tellurian, that has two separate Jira instances:
- Tellurian France (JSM instance) → Where customer support operates.
- Tellurian Germany (Jira instance) → Where the development team works.
A customer named Clara encounters an issue with her Air Cleaner product and raises a support request through the JSM customer portal. The support agent, Suzie, identifies the issue as requiring escalation to the development team, managed by Ryan, a developer in Jira Software.
Since the two teams use different instances, Suzie must clone the Jira issue to the development team’s Jira project while ensuring all relevant data is transferred.
Step-by-step guide to issue escalation
1. Customer submits a ticket in JSM
- Clara, the customer, logs into the JSM customer portal and submits a request regarding an update failure on her Air Cleaner device.
- The request is now visible to Suzie, the support agent.
2. Support agent reviews and escalates the ticket
- Suzie receives the request in the JSM queue.
- She reviews the issue, adds necessary labels (product type, component…).
- Identifies the issue as requiring development intervention.
- Changes the ticket status to Escalated.
- Uses the Project Picker to pick the relevant development project (AirCleaner) and confirms escalation.
Behind the scenes:
The configured Elements Copy & Sync recipe automatically clones the Jira issue to the target Jira project, ensuring all relevant details are copied.
3. Developer reviews the escalated issue
- Ryan, the developer, opens the newly created ticket in Jira.
- All information from the JSM ticket (including comments, attachments, and labels) has been copied over.
- Ryan requires additional diagnostic files to investigate the issue further.
4. Synchronizing comments between JSM and Jira
- Ryan comments on the Jira issue, requesting the diagnostic file.
- The comment is automatically synchronized to the original JSM ticket.
- Suzie, the support agent, receives the developer’s request and updates the customer via the JSM portal.
5. Customer provides additional information
- Clara, the customer, uploads the requested diagnostic file via the JSM customer portal.
- The attachment and comment are automatically synchronized to the Jira ticket.
6. Developer resolves the issue
- Ryan receives the diagnostic file and resolves the issue in Jira.
- He transitions the ticket to Done.
7. Automatic status synchronization
- The JSM ticket is automatically updated to Resolved.
- Clara, the customer, sees the status change in her JSM portal without any additional manual updates from Suzie.
How to set up Elements Copy & Sync for issue escalation
To implement this cross-instance issue escalation, follow these steps:
Step 1: Connect the two instances
- In your source instance (JSM), go to the Elements Copy & Sync.
- Navigate to Connections.
- Click Add a remote instance.
- Paste the URL of the target instance (where the issue should be cloned).
- In the target instance, go to the Connections tab, review the request, and approve it.
Step 2: Create a recipe
- Go back to the source instance and open the app.
- Click Create a new recipe.
- Name the recipe (e.g., “Escalate to Development”).
- Select the target Jira instance.
- Choose which fields to clone and synchronize:
- Issue summary & description
- Labels, components, and priority
- Comments & attachments
- Status (for automatic synchronization)
Read how to synchronize issues from Jira Service Management to Jira
Step 3: Configure the project picker for dynamic escalation
- Enable the Project Picker to allow support agents to choose the correct development project.
- Configure the project selection so the same recipe can be used to clone Jira issues to multiple software projects dynamically.
Step 4: Automate the workflow with a post-function
- Go to Jira workflow settings in the JSM project.
- Add a post-function to the transition (e.g., when changing the status to “Escalated”).
- Set the post-function to trigger the recipe.
- Publish the workflow.
Step 5: Test the configuration
- Create a test support ticket in JSM.
- Escalate it using the configured workflow.
- Verify that the issue is cloned in Jira with all details.
- Add a comment in Jira and confirm it synchronizes back to JSM.
Why use Elements Copy & Sync to clone Jira issues?
- Seamless cross-instance communication
- No need to manually copy data between instances.
- Support and development teams stay aligned.
- Automatic synchronization
- Comments, attachments, and status updates sync in real time.
- Dynamic project selection with project picker
- The support agent can pick the correct development project based on the product category.
- Time-saving & reduced manual effort
- Eliminates redundant manual updates.
- Developers get complete context without switching between Jira instances.
Teams can clone Jira issues efficiently, keeping workflows smooth and reducing resolution time.
Watch Alex Ortiz review on issue escalation with Elements Copy & Sync
Check the tutorial on how to escalate a Jira issue across instances
Final thoughts
Handling issue escalation efficiently is crucial for improving customer support and development collaboration. With our app, organizations using multiple Jira instances can streamline their workflow, improve transparency, and reduce response times.
Want to see it in action? Try Elements Copy & Sync for free now.
When working in Jira, keeping track of conversations, decisions, and updates across multiple issues can be a challenge, especially when dealing with linked issues. Whether you’re managing dependencies, tracking escalations, or syncing information between teams, ensuring that comments are copied correctly is essential for maintaining visibility and collaboration.
This article explores how to copy comments to linked issues in Jira, first using Jira’s native capabilities, and then with Elements Copy & Sync, a powerful tool that simplifies and enhances the process. We’ll also cover all the different types of information you can copy using the app beyond just comments.
Cloning comments to linked issues in Jira (native method)
Jira provides a native way to copy comments, but it’s not as straightforward as many users might hope. Here’s how you can do it with automation.
Using Jira Automation rules
For a more automated approach, Jira’s Automation rules can help copy comments when certain conditions are met.
Steps to set up an automation rule:
- Go to Jira Administration and navigate to
Project settings > Automation. - Click “Create rule” and select the “Issue commented” trigger.
- Set a condition to filter for the issues where you want comments copied.
- Add an “Action” step and select “Add comment to issue”.
- Configure the rule to clone the comment to linked issues using
{{triggerIssue.comment.body}}. - Save and enable the rule.
Pros:
- Works automatically once set up.
- Reduces manual effort.
Cons:
- Requires Jira Admin permissions to configure.
- Cannot selectively clone only specific comments.
- Limited to basic copying—no advanced customization options.
While these native Jira methods work, they have significant limitations, especially for teams handling large projects with complex issue dependencies.
Copying comments with Elements Copy & Sync
Elements Copy & Sync is an Atlassian Marketplace app that makes copying comments between issues in Jira automatic, customizable, and efficient.
Instead of relying on basic automation rules, the app allows you to:
- Automatically clone comments between linked issues.
- Filter which comments get copied (e.g., based on keywords, author, or issue type).
- Sync comments in real-time for ongoing updates.
- Customize the cloning process to include additional data like attachments or labels.
Why choose Elements Copy & Sync over Jira’s native feature
| Feature | Jira Automation | Elements Copy & Sync |
|---|---|---|
| Complex configuration? | Yes | No |
| Automated copying? | Limited | Fully automated |
| Can filter which comments get copied? | No | Yes |
| Syncing real-time updates? | No | Yes |
| Works with complex workflows? | No | Yes |
How to set up the app for cloning comments
- Install the app from the Atlassian Marketplace.
- Create a new synchronization rule:
- Go to the app settings.
- Create a new recipe “Synchronize linked issues”
- Define the source and destination issues:
- Select which linked issues should receive copied comments.
- Customize the comment sync settings:
- Choose whether to clone all comments or only those matching specific criteria.
- Use advanced options to synchronize comments edits, choose the comment types to be copied (synced)
- Save the rule and activate it.

With these steps, you’ll ensure that comments stay synchronized across linked issues, eliminating the need for manual copying or basic automation.
What else can you clone with Elements Copy & Sync?
Beyond copying comments, the app offers extensive synchronization capabilities that go beyond what Jira natively supports. Here’s what else you can clone between issues:
1. Issue Fields
- Summary, Description, and Labels
- Priority, Assignee, Reporter
- Due dates and Resolution status
2. Attachments
- Automatically transfer files between issues.
- Keep documents and images in sync.
Learn how to copy attachments in Jira easily.
3. Issue Links
- Maintain relationships between issues, including parent/child or related issues.
4. Status Updates
- Automatically transition linked issues when an update occurs.
5. Custom Fields
- Clone specific custom fields required for workflows.
6. Work Log Entries
- Sync time-tracking data between issues.
These features allow teams to automate issue tracking, improve collaboration, and enhance reporting accuracy, without the hassle of manual updates.
Final thoughts
Copying comments in Jira is essential for ensuring smooth communication across issues. While Jira’s native features can help, they have limitations in flexibility.
Elements Copy & Sync provides a superior solution by:
✅ Automating the process.
✅ Allowing selective copying of comments.
✅ Syncing updates in real-time.
✅ Extending the cloning feature to other issue fields like attachments and custom fields.
🚀 Ready to improve your Jira comment cloning? Try the app for free today!
An IT service catalog is a key component of any IT service management (ITSM) strategy. It acts as a centralized platform where employees, customers, or stakeholders can access IT services, submit requests, and track their progress efficiently.
For businesses using Jira Service Management (JSM), creating a well-structured IT service catalog helps streamline IT operations, improve request management, and enhance the end-user experience. However, without proper planning, service catalogs can quickly become cluttered, outdated, and inefficient.
In this guide, we’ll walk you through the steps to build a structured IT service catalog in Jira, explore its importance, and show you how Elements Catalyst can optimize it for maximum efficiency.
What is an IT service catalog?
An IT service catalog—also known as an IT portal—is a self-service interface where users can request IT services, access support, and find information about available IT resources. Think of it as an online store for IT services, where employees or customers can submit requests, much like adding items to a shopping cart.
A well-designed IT service catalog includes:
✔️ Categories of IT services (e.g., software access, hardware requests, troubleshooting).
✔️ Request types with clear descriptions.
✔️ Forms to collect necessary details.
✔️ Approval workflows to ensure proper validation.
✔️ Service-level agreements (SLAs) to set response and resolution expectations.
Read more on what is an IT Service Catalog
IT service catalog vs. IT portal
The terms IT service catalog and IT portal are often used interchangeably because they serve the same purpose: providing users with an interface to request IT services. The difference is that an IT portal usually refers to the user-facing front end, while the IT service catalog encompasses the entire service offering, including request workflows and back-end processes.
Why is an IT service catalog important?
A well-structured IT service catalog provides several benefits for both IT teams and end users:
1. Enhances user experience
Without an IT service catalog, employees might struggle to find the right contact for IT support. A centralized catalog simplifies the process by providing a single place to ask for assistance, improving efficiency and reducing frustration. It also helps users navigate IT services quickly and easily.
2. Increases IT efficiency
IT teams receive fewer emails, phone calls, and unstructured support requests. Instead, they can manage and categorize requests efficiently, leading to faster resolution times and reduced workload. The right setup helps teams stay organized and focused on high-priority issues.
3. Reduces shadow IT
Without a structured IT service catalog, employees may bypass IT policies by finding their own solutions, leading to security risks and compliance issues. An intuitive IT portal encourages users to engage with approved IT services and helps IT managers maintain control over technology usage.
4. Enables better decision-making
Tracking service requests provides valuable insights into frequently requested services, recurring issues, and inefficiencies. These insights help IT teams optimize workflows, allocate resources, and improve service delivery over time.
5. Supports cost management
By monitoring service usage and costs, IT teams can make informed decisions about service pricing, optimize resource allocation, and eliminate redundant services. Transparency in cost tracking helps businesses reduce unnecessary expenditures and improve financial planning.
Steps to create your IT service catalog in Jira Service Management
Now that we understand the importance of an IT service catalog, let’s explore how to set one up in Jira Service Management.
Step 1: Set up the Help Center
The Help Center is the front-facing IT portal where users access the service catalog. It provides a user-friendly experience by listing available services and request options.
1️⃣ Navigate to Jira Service Management > Help Center.
2️⃣ Customize the branding, layout, and messaging to align with your company’s identity.
3️⃣ Add links to knowledge base articles to encourage self-service support. A well-structured Help Center helps users resolve common issues without IT intervention.
Step 2: Configure the portal
The portal is where users select and submit their requests. Each project in Jira Service Management has its own portal page, allowing for department-specific service catalogs.
1️⃣ Navigate to Project Settings > Portal Settings.
2️⃣ Customize the name, logo, and welcome message.
3️⃣ Ensure permissions are correctly set so users can access the right services. Setting up clear navigation helps reduce confusion for end users.
Step 3: Create service groups
Grouping services by category makes navigation easier. Common service groups include:
✔️ Hardware Requests (Laptops, accessories, printers)
✔️ Software Requests (New licenses, access to applications)
✔️ Access & Permissions (VPN, email accounts, system access)
✔️ Troubleshooting & Support (Bug reports, IT incidents)
1️⃣ Go to Project Settings > Request Types.
2️⃣ Click Create Group and assign request types to relevant categories. Proper categorization helps users quickly find the right services.
Step 4: Define request types
Request types define what services users can request. Each request type includes fields, forms, and workflows tailored to specific IT services.
1️⃣ Go to Project Settings > Request Types.
2️⃣ Click Create Request Type and define:
- Name (e.g., “Request a new laptop”).
- Description (Explain what the request includes).
- Custom fields (e.g., urgency, department, device model).
3️⃣ Map request types to appropriate workflows to automate approvals. Efficient request handling helps IT teams stay productive.
Step 5: Build custom forms
Forms ensure that IT teams collect all necessary information upfront.
1️⃣ Go to Project Settings > Forms.
2️⃣ Create custom forms with required fields.
3️⃣ Use conditional logic to simplify forms based on user selections. Smart forms help improve accuracy and reduce back-and-forth communication.
How to improve your IT service catalog management with Elements Catalyst
Creating an IT service catalog in Jira Service Management is a crucial step toward efficient IT service delivery, but maintaining and optimizing it over time presents its own challenges. Without continuous oversight, service catalogs can become cluttered with outdated request types, redundant services, or inefficient workflows—leading to poor user experience and increased IT workload.
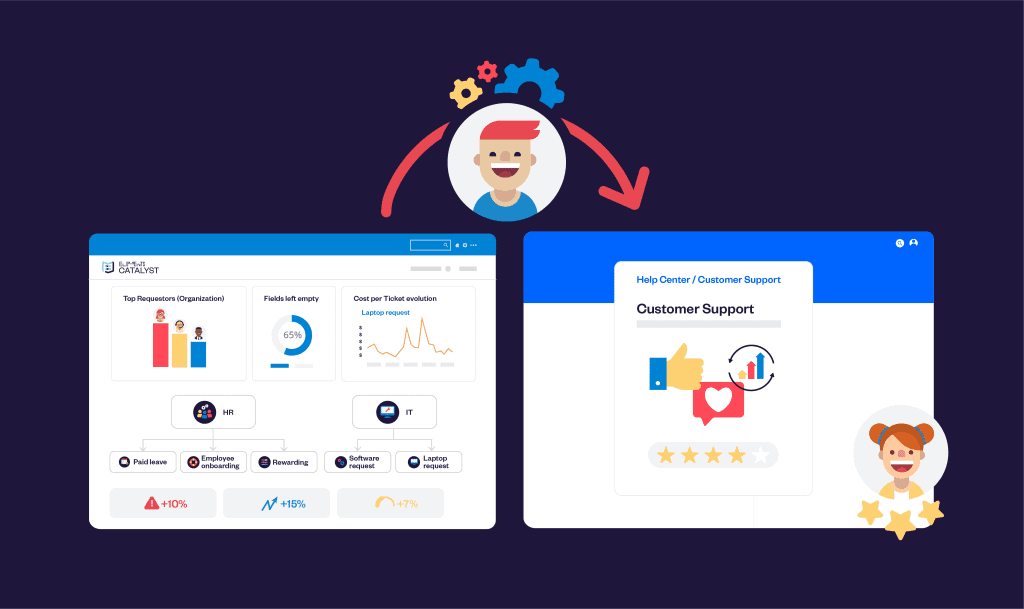
This is where Elements Catalyst comes in. By integrating the app with Jira Service Management, IT teams can ensure their IT service catalog remains relevant, efficient, and optimized. This powerful solution provides data-driven insights, automation, and tracking tools to keep IT service catalogs up to date and aligned with organizational needs.
What is Elements Catalyst?
Elements Catalyst is an advanced IT service catalog optimization tool designed to enhance Jira Service Management. It empowers IT teams by:
✅ Providing deep insights into service catalog usage – Understand which request types are frequently used, identify outdated services, and detect inefficiencies that slow down request processing.
✅ Detecting messy or redundant request types – Elements Catalyst helps IT managers clean up their catalog, ensuring users see only relevant and useful services, reducing confusion, and improving the overall experience.
✅ Enabling cost transparency and service pricing – Displaying service costs upfront allows organizations to manage budgets more effectively while providing users with a clear understanding of the expenses associated with their requests.
✅ Tracking service-level performance – With built-in analytics, IT managers can track how well their service catalog is performing by monitoring metrics like request volume, resolution times, and request accuracy.
✅ Helping IT teams maintain a high-performing service catalog – By continuously monitoring service performance and usage, Elements Catalyst ensures that IT teams can adapt their service catalog based on evolving user needs and business priorities.
Check Elements Catalyst documentation
Measuring IT service catalog performance: the key metrics to track
To ensure your IT service catalog remains effective, it’s essential to track key performance metrics. These include:
📌 Request Volume & Trends – Identify the most and least requested services to adjust catalog offerings accordingly.
📌 Service Fulfillment Time – Track how long it takes for requests to be completed and improve response efficiency.
📌 Request Cancellation & Reclassification Rates – A high number of canceled or reclassified requests may indicate confusion or poor request categorization.
📌 User Satisfaction Scores – Measure end-user feedback to ensure the service catalog meets expectations.
📌 Service Cost vs. Usage – Understand the financial impact of each service and make data-driven cost optimizations.
With Elements Catalyst, IT teams can track these metrics effortlessly and make adjustments based on real-time data.
Conclusion
Maintaining an IT service catalog is just as important as creating one. Without proper management, service catalogs can become outdated, inefficient, and frustrating for end users. Elements Catalyst ensures that IT teams can continuously monitor, improve, and optimize their IT service catalog for better performance, cost efficiency, and user satisfaction.
If you’re looking to take your IT service catalog to the next level, Elements Catalyst provides the tools, analytics, and automation needed to keep your catalog running at peak performance.
🚀 Try Elements Catalyst for free today!
Introduction
If you work with Jira regularly, you’ve probably faced the challenge of copying attachments from one issue to another. Whether you’re managing software development tasks, tracking bugs, or handling customer requests, moving attachments between issues efficiently is essential. In this guide, we will explore how to copy attachments in Jira using built-in methods, highlight their limitations, and introduce a more efficient way with Elements Copy & Sync.
How to copy attachments in Jira natively
Jira does not provide a built-in “Copy Attachments” feature. However, there are a few workarounds you can use:
Method 1: Manual download & upload
- Open the source Jira issue.
- Navigate to the “Attachments” section.
- Download the attachments to your computer.
- Open the destination issue where you want to clone the attachments.
- Select “Add Attachment” and upload the files.
Pros:
✔ Simple and does not require additional configuration.
✔ Works for all Jira users.
Cons:
✖ Time-consuming, especially for multiple attachments.
✖ Risk of missing files or uploading incorrect versions.
Method 2: Clone the issue
- Open the issue with the attachments.
- Click More > Clone.
- Select “Clone Attachments.”
- Click “Create.”
Pros:
✔ Faster than manual download & upload.
✔ Ensures attachments remain linked to the issue.
Cons:
✖ Does not work when moving attachments to an existing issue.
✖ Requires deleting unnecessary cloned tickets.
Method 3: Jira Automation rules
You can set up Jira automation rules to clone attachments when issues transition between statuses.
- Go to Project Settings > Automation.
- Click Create Rule and set a trigger (e.g., “When an issue is updated”).
- Add an action: Edit issue fields and select “Attachments.”
- Configure the rule to copy attachments from one issue to another.
Pros:
✔ Works automatically for defined workflows.
✔ Saves time compared to manual methods.
Cons:
✖ Complex setup; requires Jira admin access.
✖ May not cover all use cases
Limitations of native Jira methods
While the above methods can work, they come with significant drawbacks:
🚫 No direct clone feature – Users must manually download and upload files.
🚫 Workflow dependency – Jira automation works only within predefined workflows.
🚫 No bulk attachment cloning – If you need to clone multiple attachments across multiple issues, it quickly becomes a tedious task.
🚫 Higher risk of errors – Manual handling increases the chances of missing or misplacing files.
For teams dealing with large volumes of attachments, a more efficient and reliable solution is necessary.
A better way: Copy attachments in Jira with Elements Copy & Sync
Elements Copy & Sync is a powerful Jira add-on that allows users to clone attachments seamlessly between issues without manual work.
How it works
The app will allow you to automate the process of cloning attachments between Jira issues with simple, no-code configuration.
Follow the steps
- Install the Elements Copy & Sync App
- Go to Atlassian Marketplace and install the app.
- Set up a recipe
- Create the rule: When an issue is created, transitioned, or updated, attachments from a source issue should be copied.
- Select the fields to copy
- Choose to clone attachments along with other issue fields like comments, links, or assignees.
- Sync attachments automatically
- Unlike Jira’s native options, the app doesn’t just copy attachments once—you can configure it to sync attachments between linked issues. This means that if new attachments are added to the source issue, they will automatically be copied to the target issue, ensuring both stay up to date.
- Test & automate the process
- Run a test to ensure that your configuration is correct. Once confirmed, the rule will work automatically whenever the trigger conditions are met.

Read documentation on how to copy an issue with all its comments and attachments
Why use Elements Copy & Sync?
✔ Automated – No need to manually download and upload attachments.
✔ Bulk clone – Move multiple attachments across multiple tickets instantly.
✔ Sync attachments – Keep attachments up to date between linked issues effortlessly.
✔ Works across projects – Clone attachments even between different Jira projects.
✔ No-script configuration – Set up rules easily with a user-friendly interface.
✔ Reduces human errors – Ensures files are copied and updated accurately every time.
Learn how to clone Jira issues and keep them in sync in Jira Cloud
Conclusion
Copying attachments in Jira is a frequent requirement, but native methods can be time-consuming and error-prone. Elements Copy & Sync offers a faster, more reliable solution by automating the process and ensuring attachments are transferred seamlessly. The configuration is simple and quick, allowing you to focus on more important tasks.
💡 Try the app for free on the Atlassian marketplace!
IT Service Catalog: How to structure, optimize, and improve Service Management
Imagine walking into a restaurant and being handed an overwhelming and chaotic menu. The dishes are listed without categories, descriptions are overly complex, and the prices aren’t clear. You spend more time deciphering the menu than enjoying your meal. Frustrating, right?
Now, apply this scenario to your company’s services. Without a well-structured IT service catalog, your users and teams might feel just as overwhelmed, struggling to find what they need in a sea of disorganized information. Without clear access to essential services, frustration grows, slowing down operations. A well-designed service catalog ensures users quickly find what they need, reducing inefficiencies.
In this article, we’ll explore what an IT service catalog is, why it’s essential and how to build one effectively using best practices. Get ready to explore the full menu of your organization’s service offerings!
What is an IT service catalog?
An IT service catalog isn’t just an IT tool—it’s also a key part of enterprise service management, offering a big-picture view of services across the organization, like HR, finance, or legal.
Think of an IT service catalog like a menu for enterprise services. You can organize it into categories (starters, mains, sides, desserts) so different business areas can easily find what they need.
Each “menu item” can also include its “ingredients”—but instead of tomatoes and salad, you can list things like costs and support levels.
In essence, it’s a centralized resource that lays out all the services your organization offers. Each service is clearly described with details like its purpose, how to access it, potential costs, requests types, and the level of support available.

Key ingredients of an IT service catalog:
- Service descriptions – What “dishes” are available, whether it’s resetting a password, installing software, or launching new employee onboarding.
- Access conditions – Who can order the service and under what circumstances.
- Request workflows – The process for submitting and fulfilling requests efficiently.
- Slas and xlas – Expected delivery times or quality levels for services.
- Associated costs – Whether there are any direct or indirect costs for using the service.
Why use an IT service catalog?
Just like a restaurant menu, an IT service catalog offers essential benefits for both users and service management teams.
1. Clarity for users
Users know exactly what services are available, how to request them, and what to expect. This reduces frustration and errors.
2. Team efficiency
Service teams benefit from a clear reference that allows them to handle requests more quickly and prioritize their efforts. By reducing repeated requests for the same service, teams can focus on higher-priority tasks.
3. Alignment with business goals
By identifying key services, organizations can better align resources with strategic objectives. A well-structured service catalog supports business growth and adaptability.
4. Improved user experience
Providing smooth access to services enhances end-user satisfaction. With intuitive navigation and clear descriptions, users are better served, reducing friction in the request process.
5. Cost and efficiency optimization
A clear IT service catalog reduces redundancies and simplifies resource management. By eliminating duplicate requests, teams can focus on continuous improvement. Well-structured management of service catalogs improves workflow and ensures smoother operations.
The challenges of operating without an IT service catalog
When organizations lack an IT service catalog, problems arise quickly:
- Confusion and frustration – Users don’t know who to contact or what they can request.
- Wasted time – Teams spend their time answering the same questions or handling poorly formulated requests.
- Misaligned strategy – IT resources are wasted on tasks that add little value.
Without an IT service catalog, an IT organization risks becoming a “disorganized kitchen,” where no one knows who’s doing what or why.
Steps to design an effective IT service catalog
Creating an IT service catalog is a strategic endeavor that requires planning and a methodical approach. Here are the essential steps:
1. Identify your services
Start by listing all the services your organization provides. Think of everything users regularly request: technical support, equipment provisioning, software access, etc.
2. Categorize the services
Organize services into logical categories for intuitive navigation. For example:
- IT services: Technical support, account management.
- HR services: Leave requests, onboarding.
- Financial services: Expense reimbursements, budget creation.
3. Write clear descriptions
Ensure the IT service catalog is easy to navigate. Provide simple, understandable descriptions for each service, avoiding technical jargon.
4. Include service levels
Add information about processing times and expected quality levels. This helps set user expectations and measure performance.
5. Integrate automation tools
Link your catalog to automated workflows to simplify request and delivery processes. For example, use tools like Jira Service Management workflows and automation.
6. Integrate feedback mechanisms
Incorporate feedback tools to measure user satisfaction and adjust the catalog content accordingly.
7. Maintain and update regularly
An outdated IT service catalog is useless. Plan regular reviews to add, modify, or remove services based on evolving needs. Ensuring up-to-date management of your service catalog keeps operations running smoothly.
Check out which important metrics you should follow to measure your IT service catalog performance
Best practices to maximize your IT service catalog’s impact
Prioritize user experience
Think of your users as customers in a restaurant. Make their experience as intuitive as possible. Avoid technical jargon and use simple terms.
Leverage user feedback
Like a chef adjusting recipes based on customer reviews, incorporate feedback mechanisms to identify what works and what needs improvement.
Communicate regularly
Ensure users know the IT service catalog exists and why it’s important. Awareness campaigns or training sessions can help.
Align IT with strategic goals
Link catalog services to business objectives to demonstrate their value.
The benefits of a well-managed IT service catalog
A well-designed IT service catalog quickly becomes an indispensable tool for organizations. Here’s what you can expect:
- Enhanced end-user satisfaction
- Optimized IT and ESM processes
- Better alignment of resources with strategic priorities
- Cost reductions by eliminating inefficiencies and redundancies
- Improved operations efficiency and workflow clarity

To ensure your IT service catalog remains up-to-date, efficient, and aligned with business needs, consider using Elements Catalyst.
This solution empowers service management teams in Jira Service Management with smart analytics and cost insights, helping you spot outdated requests, track service costs, and optimize performance effortlessly. With data-driven insights, you can eliminate inefficiencies, enhance customer satisfaction, and deliver a seamless service portal experience. Ready to take your service catalog to the next level?
Try Elements Catalyst for free now.
Conclusion: offer your users a clear and accessible menu
Just as a restaurant thrives on a well-crafted menu, your organization will thrive with a well-structured IT service catalog. By following the steps and best practices outlined here, you can create a powerful tool that not only simplifies user interactions but also optimizes your internal operations.
Jira is a powerful tool for issue tracking and project management, widely used by software development teams, IT service desks, and business teams. One of its essential How to create Jira linked issues: a step-by-step guide
Jira is a powerful tool for issue tracking and project management, widely used by software development teams, IT service desks, and business teams. One of its essential features is the ability to link issues together, allowing users to establish relationships between different tasks, track dependencies, and improve collaboration.
In this article, we’ll walk you through how to manage Jira linked issues using native features. Then, we’ll explore a more efficient way to do this using Elements Copy & Sync, an app that simplifies and automates issue linking across projects.
Creating linked issues in Jira natively
Jira allows users to link issues manually, providing better visibility into dependencies, blockers, or related tasks. You can establish links between tickets in different projects or within the same project. Managing Jira issues is crucial for ensuring smooth project execution and helping teams work efficiently. By using this feature effectively, your team can make their daily work easier and avoid unnecessary delays.
Step 1: Open the issue you want to link
- Log in to Jira and navigate to your project.
- Open the issue that you want to link to another issue.
Step 2: Select “link issue”
- In the issue view, look for the “link” option. This is usually found in the issue’s action menu or under the “more” dropdown, depending on your Jira version.
- Click “link”, and a dialog box will appear.
Step 3: Choose the link type
Jira provides different types of issue links to specify relationships. Some common link types include:
- clones: the issue is a clone of another.
- blocks: the linked issue prevents work from proceeding.
- is blocked by: the issue cannot be completed until another issue is resolved.
- relates to: the issue is connected but does not have a dependency.
- duplicates: the issue is a duplicate of another.

By carefully choosing the correct link type, you ensure that your Jira issues are properly categorized for better tracking and collaboration. When teams know whether an issue blocks another, they can better prioritize their work and coordinate across projects.
Step 4: Enter the issue key or search for the issue
If you know the issue key (e.g., “PROJ-123”), enter it directly.
Alternatively, use the search function to find the issue you want to link.
Step 5: Confirm and save
Once you’ve selected the correct issue and link type, click “link” to save the relationship. The Jira issues will now appear in the issue view under the “issue links” section, making it easy to track connections between tasks and work dependencies.
Read more on how to link work items natively
A smarter way to create linked issues: Elements Copy & Sync
While Jira’s native issue linking works well, it often requires multiple manual steps, especially when dealing with complex workflows or repetitive tasks. This is where Elements Copy & Sync comes in.
It’s a Jira app that streamlines issue creation and linking by allowing users to:
- create and link issues in one action
- automatically copy issue data to new issues
- sync field updates between parent and child issues
- apply predefined templates for consistency
This feature-rich app makes daily work more efficient and ensures nothing falls through the cracks.
How to create and link issues in Jira with Elements Copy & Sync
Step 1: Install and configure Elements Copy & Sync
- Go to Jira administration > apps and install the app from the Atlassian Marketplace.
- Configure the app by setting up copy rules and linking rules based on your use case.

Step 2: Trigger the recipe in the issue action menu
- Open the source issue.
- Select Elements Copy & Sync in the issue actions menu.

Read documentation to guide you through the steps
Step 3: Select the target project and issue type
Choose whether you want to copy the issue within the same project or to a different project.
Select the issue type (e.g., task, bug, story).
Step 4: Define what data to clone
Elements Copy & Sync allows you to automatically clone:
- summary and description
- custom fields
- assignee and reporter
- attachments and comments
This eliminates the need for manual data entry and ensures consistency across Jira issues. The feature saves valuable time, especially when teams need to duplicate work for multiple projects.
Step 5: Enable synchronization (optional)
If you need the Jira issues to remain updated in real-time, enable sync rules. This ensures that changes to the original issue (e.g., status updates, field changes) are reflected in the linked issue.
Step 6: Click “create linked issue”
The new issue is created instantly with the link already established.
Synchronize issues automatically with Elements Copy & Sync
Another powerful feature of the app is its ability to synchronize Jira issues automatically using synchronization recipes. When creating links, you can define specific synchronization rules that ensure updates in one issue are reflected in the related issue(s). You can also choose which type of link to synchronize, whether it’s “blocks”, “is blocked by”, “relates to”, or any other custom link type in Jira.
With synchronization recipes, you can configure which fields should stay in sync between Jira issues, such as status, assignee, priority, or custom fields. If you need to find which issues have been synchronized, you can use Jira’s search function to filter issues based on their link type and status.

Learn more about how to synchronize Jira issues
Display issues in the Jira customer portal
One of the unique advantages of Elements Copy & Sync is its ability to display Jira issues directly in the Jira Service Management (JSM) customer portal. This provides customers with real-time visibility into related tickets, such as escalated support tickets, feature requests, or bug fixes.
Learn more about how to display issues in the customer portal.

Why use Elements Copy & Sync for Jira linked issues?
Here are some key benefits of using the app over Jira’s native linking system:
- Faster issue creation: no need to manually enter details for issues, data is copied automatically.
- Reduced errors and inconsistencies: by automating data transfer, Elements Copy & Sync ensures that Jira issues contain accurate information.
- Synchronization between issues: updates in one issue can be automatically reflected in its related issue(s), preventing communication gaps and improving team workflows.
- Simplified workflows: instead of manually linking issues each time, users can rely on pre-configured automation to handle repetitive tasks across multiple projects.
This feature provides teams with the ability to manage dependencies and coordinate their work more effectively across Jira.
Conclusion
Creating Jira issues is essential for managing dependencies and improving issue tracking. While Jira offers a built-in way to link issues, the manual process can be time-consuming.
For teams that need a faster and more automated approach, Elements Copy & Sync provides a powerful solution. With its ability to automate issue creation, copy data, and sync updates, it simplifies workflows and enhances collaboration.
If your team frequently works with linked issues, try the app to save time and improve efficiency. 🚀
Imagine walking into a restaurant with an impeccable menu but encountering slow service or incorrect orders. While the menu—the IT service catalog—sets expectations, true success depends on delivering what’s promised. In IT service management (ITSM), the same principle applies: a well-designed IT service catalog is valuable only when it drives effective outcomes.
To ensure your IT service catalog meets business and user needs, tracking the right metrics and data is essential. This article explores key metrics that help organizations manage and optimize their IT service catalogs, turning them into tools for efficiency and value.

Why measure IT service catalog performance?
An IT service catalog serves as a bridge between IT and end-users, aligning IT capabilities with business needs. Without tracking its performance, the IT service catalog risks becoming outdated, inefficient, or misaligned with organizational priorities. Measuring performance with data helps:
- Provide visibility: Understand how services are used and which are in demand.
- Drive efficiency: Identify bottlenecks and streamline service delivery.
- Boost user satisfaction: Ensure the IT service catalog meets end-user expectations.
- Ensure strategic alignment: Adapt the catalog as business priorities evolve.
Tracking metrics offers actionable insights to keep your IT service catalog relevant, efficient, clear and impactful.
Discover what is an IT service catalog
Key metrics to track in IT service catalog management
1. Service request volume
What it measures: The number of requests for each service over a set period.
Why it matters: Highlights which services are most or least utilized, helping to identify gaps, redundancies, or areas for improvement.
Example insight: A sudden spike in requests for a specific service could signal a shift in user needs or a recurring issue that requires attention within the IT service catalog.
2. Fulfillment time (average handling time)
What it measures: The average time to fulfill service requests from initiation to completion.
Why it matters: Long fulfillment times can frustrate users and reduce productivity. This metric pinpoints inefficiencies in workflows or resource allocation within the IT service catalog.
Example insight: If password reset requests take longer than expected, automating the process within the IT service catalog could significantly improve resolution times.
3. Data accuracy and completeness
What it measures: The percentage of requests submitted with complete and accurate information, and the frequency of corrections required.
Why it matters: Incomplete submissions slow down processes and increase workload for support teams. Tracking this ensures better guidance and form design in the IT service catalog.
Example insight: Frequent issues with incomplete hardware requests may indicate the need for clearer forms or mandatory fields in the IT service catalog.
4. SLA compliance rate
What it measures: The percentage of requests fulfilled within agreed service level agreements (SLAs).
Why it matters: SLA compliance builds trust and ensures IT meets performance expectations.
Example insight: A low compliance rate for critical services could indicate resource shortages or process inefficiencies within the IT service catalog.
5. User satisfaction (CSAT scores)
What it measures: End-user satisfaction, typically collected through post-resolution surveys.
Why it matters: While operational metrics show efficiency, CSAT reflects perceived quality.
Example insight: Low satisfaction with a popular service in the IT service catalog could indicate poor communication, inadequate support, or misaligned expectations.
6. Catalog coverage and accuracy
What it measures: The percentage of IT services included in the catalog and the accuracy of their descriptions.
Why it matters: An incomplete or outdated IT service catalog undermines its value as a resource.
Example insight: Regular audits can reveal missing services or outdated descriptions, prompting updates to maintain relevance in the IT service catalog.
7. Catalog effectiveness
What it measures: Factors like escalation rates, misrouted requests, and canceled requests due to incomplete or incorrect information.
Why it matters: High escalation or misrouting rates highlight issues with workflows, categorization, or user guidance in the IT service catalog.
Example insight: If many hardware requests are misrouted, refining categories or providing contextual guidance during the request process within the IT service catalog could reduce errors.
8. Cost per request
What it measures: The average cost to fulfill a service request.
Why it matters: Identifying cost-efficiency helps justify budgets and optimize resource allocation.
Example insight: If software installations have high costs, automating configurations or standardizing processes in the IT service catalog could reduce expenses.
How to implement and track these metrics
Define clear objectives
Align metrics with clear organizational goals. For example, if user satisfaction is a priority, focus on CSAT scores and SLA compliance in the IT service catalog.
Leverage ITSM tools
Use ITSM platforms like Jira Service Management to automatically track and analyze key metrics within the IT service catalog.
Incorporate feedback loops
Regularly evaluate performance and act on insights. For example, low CSAT scores should prompt actionable changes in service delivery through the IT service catalog.
Review metrics regularly
Analyze trends monthly or quarterly to track progress, report findings, and adjust strategies for the IT service catalog.
Roles and responsibilities in IT service catalog management
Managing an IT service catalog requires clear roles and responsibilities. For large organizations with complex catalogs, a dedicated IT service catalog team is invaluable. Key roles include:
- Service catalog manager: Oversees catalog structure and ensures alignment with business needs.
- Service owners: Manage individual services, ensuring they deliver value throughout their lifecycle.
- Cross-functional stakeholders: Provide feedback to keep the IT service catalog user-focused and relevant.
Collaboration across IT and business units is critical to ensure the IT service catalog reflects evolving priorities and user expectations.
Benefits of tracking IT service catalog metrics
By tracking the right metrics, organizations can:
✅ Enhance decision-making: Use data-driven insights to prioritize improvements and investments in the IT service catalog.
✅ Improve service quality: Identify gaps and inefficiencies to boost user satisfaction with the IT service catalog.
✅ Boost operational efficiency: Streamline workflows and eliminate bottlenecks in the IT service catalog.
✅ Align IT with business goals: Ensure the IT service catalog adapts to organizational changes.
Effective service catalog management goes beyond maintaining an up-to-date list of services—it must also prioritize customer satisfaction by ensuring that every request is processed efficiently and accurately. A well-managed catalog should provide clear, structured workflows that streamline request fulfillment and reduce bottlenecks in the service desk. When organizations place customer satisfaction at the center of their management strategy, they enhance user experience, minimize misrouted or incomplete requests, and improve overall service delivery. By continuously optimizing workflows and ensuring that the catalog accurately reflects available services, IT teams can provide a seamless experience where users can quickly find and submit the right request without unnecessary delays. Ultimately, aligning service catalog management with customer satisfaction leads to a more efficient service desk, better resource allocation, and a higher level of trust in IT services.
Managing an IT service catalog without metrics is like running a restaurant without tracking wait times or customer preferences. Metrics such as request volume, SLA compliance, and user satisfaction transform your IT service catalog into a dynamic tool for delivering value.
Start measuring today to turn your IT service catalog into the backbone of a high-performing, user-centric IT service desk. The right metrics aren’t just numbers—they’re your guide to continuous improvement.
To take your IT service catalog performance to the next level, Elements Catalyst provides the smart analytics and insights you need. Monitor request trends, track service costs, and uncover inefficiencies to ensure your catalog stays accurate, relevant, and high-performing. With data-driven decision-making, you can eliminate outdated requests, optimize fulfillment workflows, and improve user satisfaction—all while reducing operational costs. Ready to transform your IT service catalog into a powerful tool for efficiency and value?
Try Elements Catalyst for free! 🚀
Read documentation about Elements Catalyst.
Managing Jira tickets across multiple projects or instances can quickly become a logistical challenge, especially when teams rely on shared workflows or need to coordinate their tasks. Keeping issue statuses updated across projects is crucial to maintaining visibility, alignment, and efficiency. In this article, we’ll explore how to sync Jira issues, particularly their statuses, using Elements Copy & Sync.
Why would you need to sync Jira issues and statuses?
Many organizations use Jira to manage both customer support and development work, often spanning multiple projects or even instances. Here are some common scenarios where syncing Jira issues and statuses becomes essential:
- Cross-team collaboration: Teams working in different Jira projects often need to stay updated on the progress of linked issues, such as when a customer support ticket depends on a bug fix by the development team.
- Better visibility: Keeping issue statuses synced across projects ensures that all stakeholders have a clear view of the current progress, minimizing miscommunication.
- Efficiency and consistency: Manual updates are time-consuming and prone to errors. Automating the process saves time and ensures data accuracy.
- Scaling across instances: Large organizations using multiple Jira instances often need to sync Jira issue data between them for smoother cross-functional collaboration.
Syncing Jira statuses, ensures alignment and helps teams avoid bottlenecks caused by outdated information.
Learn how synchronizing Jira issues can improve your project management processes
Synchronizing with Elements Copy & Sync
Elements Copy & Sync is an Atlassian marketplace app designed to automate the synchronization (two-ways)of Jira issues across projects and even instances. Here’s how it can help you synchronize fields, statuses, and other key elements.
Syncing Jira issue fields
When synchronizing issues, fields such as summary, description, assignee, comments, attachments and priority often need to be consistent across projects. With Elements Copy & Sync, you can:
- Map fields across projects: Ensure that specific fields, like “Summary” or “Priority,” in one project match their counterparts in another.

- Maintain real-time updates: Any changes to fields in one project are automatically reflected in the linked issues of other projects. Synchronization can be set one-way or two-ways.

- Custom mapping: Customize which fields to sync, allowing you to focus only on the data that matters most.
- Synchronize once an issue is cloned: Using Elements Copy & Sync you can easily clone issues from one project to another and automatically synchronize them together.
- Synchronize two linked issues: synchronize fields, comments, attachments, and workflow statuses between any linked issues.
Syncing statuses of Jira issues
One of the most critical aspects of syncing Jira issues is ensuring that their statuses are aligned. For example, if an issue is marked as “In Progress” in one project, the corresponding issue in another project should reflect the same status.
- Automate status updates: With Elements Copy & Sync, status changes in the source issue are automatically replicated in the linked issues.
- Bidirectional syncing: Status updates can be synchronized in both directions, ensuring consistency regardless of where the status was updated.
- Customizable workflows: Map custom workflows to ensure that even unique status names or progress paths are synced correctly.

Syncing across projects and instances
Elements Copy & Sync isn’t limited to a single Jira instance. If your organization operates across multiple Jira instances, this app ensures seamless synchronization:
- Cross-instance support: Sync Jira issues between Jira Cloud instances.
- Unified view: Gain a unified view of progress across all Jira projects and instances, breaking down silos between teams.
- Scalable setup: Easily manage synchronization even as your organization scales, adding more projects and instances.
With Elements Copy & Sync, syncing Jira tickets—whether fields or statuses—becomes effortless, allowing teams to stay aligned and focus on delivering value.
Elements Copy & Sync vs. Jira Automation
Jira Automation is a built-in feature that provides some capability for syncing data between projects. However, when it comes to syncing Jira issues comprehensively, particularly across instances, Elements Copy & Sync offers unique advantages.
Advantages of Elements Copy & Sync over Jira Automation
- Cross-Instance Synchronization: While Jira Automation is limited to a single instance, Elements Copy & Sync enables seamless synchronization between different Jira instances.
- Granular Customization: Elements Copy & Sync offers detailed control over which fields, statuses, and attachments are synced, ensuring flexibility to meet specific needs.
- User-Friendly Interface: Configuring synchronization recipes in Elements Copy & Sync is intuitive, making it easier for teams to set up sync rules without requiring extensive technical expertise.
- Bidirectional syncing: Unlike Jira Automation, which often requires multiple rules to achieve bidirectional synchronization, Elements Copy & Sync handles this seamlessly with fewer configurations.
- Support for Attachments and Comments: Elements Copy & Sync goes beyond syncing fields and statuses by also synchronizing comments and attachments, fostering better communication between teams.
When to use Jira Automation?
Jira Automation is best suited for simpler use cases within a single instance, such as:
- Triggering notifications based on status changes.
- Copying specific fields between tickets within the same instance.
- Performing repetitive tasks for straightforward workflows.
However, for more complex requirements—such as cross-instance synchronization, customizable workflows, and maintaining a unified view across projects—Elements Copy & Sync is the better choice.
Conclusion
Keeping Jira tickets and their statuses synced is essential for fostering collaboration, improving visibility, and maintaining consistency across teams. Whether you’re working within a single project, across multiple projects, or even between different Jira instances, Elements Copy & Sync provides a robust solution for seamless synchronization.
Unlike basic tools like Jira Automation, Elements Copy & Sync offers advanced capabilities, such as cross-instance support, bidirectional syncing, and customizable mapping of fields and workflows. You can then ensure that teams remain aligned, tickets are accurately updated, and workflows run smoothly.
If syncing Jira issues is a critical part of your team’s operations, consider implementing Elements Copy & Sync today to take your Jira workflows to the next level.
Go further with our documentation on 👉 How to sync the status of two Jira issues effortlessly or 👉 How to clone and sync Jira issues across instances